Small Batch Miso: Making Your Own Umami Bomb at Home

Most people believe that making miso requires a massive, temperature-controlled warehouse and a specialized industrial setup. That's a myth. You can actually create a high-quality, deeply flavorful miso paste right in your own kitchen using just a few basic ingredients and a bit of patience. This guide breaks down the process of small-batch fermentation, the science of koji, and the specific steps to produce your own umami-rich paste at home.
Miso isn't just a condiment; it's a living, breathing product of enzymatic breakdown. While the grocery store version is fine for a quick soup, a homemade batch offers a depth of flavor that mass-produced brands simply can't match. We're talking about a complex profile that shifts from sweet and light to savory and pungent depending on how long you let it age.
What is the difference between white, red, and yellow miso?
The primary difference between these varieties lies in the ratio of grain (usually rice or barley) to soybeans and the length of the fermentation period. White miso (Shiro miso) is generally made with a higher ratio of rice koji and a shorter fermentation time, resulting in a sweeter, milder flavor. Yellow miso (Shinshu miso) sits in the middle of the spectrum, offering a balanced savory note. Red miso (Aka miso) uses more soybeans and undergoes a much longer aging process, which produces a saltier, more intense, and deeply savory profile.
Understanding these differences helps you decide which one to make based on how you plan to use it. If you want something to brighten up a delicate vegetable dish, go for white. If you're looking to add weight to a hearty stew, red is your best bet. It’s a bit like coffee—the longer you roast (or in this case, ferment), the more intense the profile becomes.
Before we get into the mechanics, it's worth noting that the backbone of this entire process is Aspergillus oryzae, commonly known as Koji mold. This is the same organism used to make sake and soy sauce. You can read more about the biological properties of this mold on the Wikipedia page for Aspergillus oryzae.
The Essential Tool Kit
You don't need a laboratory, but you do need precision. Because we are dealing with live cultures, consistency matters. If your salt levels are off, you might end up with a jar of moldy mush rather than delicious paste. Here is what you'll need:
- High-quality Koji Rice: This is your starter. I recommend using Mizkan or a similar reputable Japanese brand to ensure the grain is properly inoculated.
- Organic Soybeans: You want high protein content here.
- Sea Salt: Avoid iodized salt; it can interfere with the fermentation process. Use a pure sea salt or kosher salt.
- Digital Scale: Grams matter. Do not eyeball this.
- Glass or Ceramic Crock: Avoid plastic if possible, as the high salt content and long aging can cause leaching.
How long does it take to make homemade miso?
The timeline for miso fermentation ranges from three months for a light white miso to over two years for a deep, dark red miso. While you can technically eat it after a few weeks, the enzymes haven't had enough time to truly break down the proteins into amino acids (the source of that savory umami sensation).
Patience is the hardest part of this process. You might be tempted to open the jar every few days to check on it, but try to resist. Every time you open it, you introduce oxygen and potential contaminants. Let the microbes do their work in a stable environment.
If you've ever worked with other fermented foods, you might find the timeline familiar. For instance, if you've explored fermentation secrets for your first batch of sauerkraut, you'll know that the "waiting game" is a fundamental part of the craft. The difference here is that miso is an enzymatic fermentation rather than a purely lactic acid fermentation.
The Small-Batch Miso Method
This recipe yields a versatile, medium-aged miso that works beautifully in both soups and marinades. We'll use a standard 1:1 ratio of cooked soybean weight to koji weight for a balanced result.
- Prepare the Soybeans: Soak 500g of dried organic soybeans in water for 12-24 hours. Boil them until they are soft enough to crush easily between your fingers. Drain them thoroughly.
- Prepare the Koji: Use 500g of pre-made Koji rice. If you're using a high-quality product like Hikari Miso rice, ensure it is fresh and has a pleasant, slightly sweet aroma.
- Mix the Ingredients: In a large bowl, combine the warm (not hot!) soybeans and the koji. Add 150g of sea salt. The salt is what prevents "bad" bacteria from taking over while the "good" stuff works.
- The Kneading Stage: This is the most physical part. Use your hands to mix and knead the mixture until the salt and koji are perfectly distributed. The texture should be uniform.
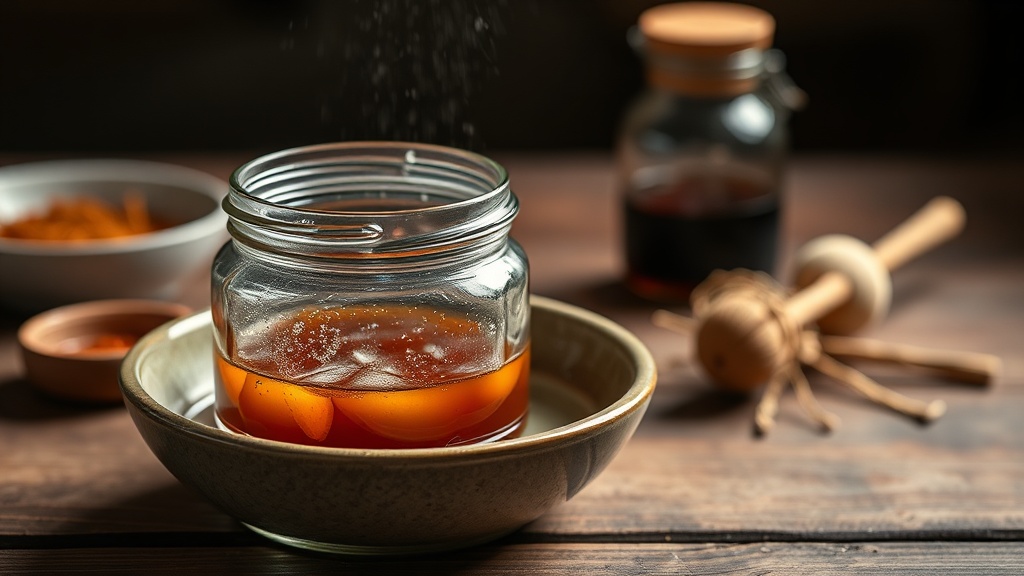
- Packing the Crock: Pack the mixture into your sterilized ceramic crock. Press it down hard—really hard—to remove any air pockets. Air is the enemy here.
- The Weighting: Place a piece of parchment paper or a clean cabbage leaf over the top of the paste. Place a weight (like a heavy ceramic plate or a specialized fermentation weight) on top to keep the paste submerged.
| Miso Type | Soybean/Koji Ratio | Fermentation Time | Flavor Profile |
|---|---|---|---|
| White (Shiro) | 1:2 (More Koji) | 1–3 Months | Sweet, light, creamy |
| Yellow (Shinshu) | 1:1 (Equal) | 6–12 Months | Balanced, savory, nutty |
| Red (Aka) | 2:1 (More Soy) | 1–2 Years | Strong, salty, pungent |
The table above serves as a general guide for your ratios. If you want a sweeter, lighter miso, increase the amount of koji relative to the soybeans. If you want something heavy and salt-forward, increase the soybean and salt ratio.
Is it safe to eat homemade miso?
Yes, it is safe to eat as long as you maintain a high enough salt concentration and keep the mixture anaerobic (without oxygen). The salt acts as a preservative, inhibiting the growth of spoilage-causing bacteria while allowing the Aspergillus oryzae to thrive. If you see a white film on top, it might be Kahm yeast, which is generally harmless but should be scraped off. However, if you see fuzzy mold that is black, green, or bright orange, something has gone wrong—toss the whole batch.
To ensure success, keep your crock in a cool, dark place. A pantry or a basement is ideal. Avoid areas with fluctuating temperatures, as extreme heat can kill the enzymes and extreme cold can stall the fermentation. A stable, room-temperature environment is the sweet spot.
One thing to watch for is the texture. As the miso ages, it will become smoother and more homogenous. If you're using this in a dish, remember that the salt content is much higher than you'd expect. A little goes a long way. If you find your miso is too salty, you can balance it with a touch of sweetness or a dash of acidity—much like how acidity transforms a dish, a tiny bit of honey or mirin can soften the salt hit.
The beauty of making your own miso is the control. You aren't just making a condiment; you're managing a biological process. You're watching as proteins break down into the amino acids that give us that deep, savory satisfaction. It's a slow, methodical process, but the reward is a staple that will make your kitchen feel much more professional.
Once your batch is ready, store it in the refrigerator to slow down the fermentation further. It will keep for a long time, though the flavor will continue to evolve subtly even in the cold. Use it in everything from dressings to marinades, or even just stirred into a bowl of hot rice. The depth you've created is yours to use.